List of blogs I follow and comment on:
1. http://stringingskills.blogspot.com/
2. http://quadroflcopter.blogspot.com/
3. http://peartisapunkpalmerisagod.blogspot.com
Week 2:
4. http://theartofwarsc2.blogspot.com
5. http://jspitt.blogspot.com
6. http://samkesgeniusproject.blogspot.com
^They are here they just look invisible
Week 3:
7. http://doingthe3.blogspot.com
8. http://21cmr.blogspot.com
9. http://aslin7weeks.blogspot.com
Week 4:
10. http://wissahickoncompliments.blogspot.com
11. http://designsbyjennyd.blogspot.com
12. http://igotthemagicdansmoi.blogspot.com/
13. http://introtojavaprogramming.blogspot.com
14. http://16jabrams.blogspot.com/
15. http://benowitzianblog.blogspot.com/
Thursday, February 28, 2013
Saturday, February 23, 2013
Material List (Second Post)
Hello blog readers! As you know I am practicing the art of cinematography and I would like to give you a rundown of the materials and software I will ultimately be using for the duration of this project.
Camcorder (Sony CX260V):
To record the videos I will be taking I will be using the Sony CX260V. This is an HD camcorder that records in qualities up to 1080p. 1080p is often to referred to as "full HD", and is known for having 1080 horizontal lines of vertical, distinct pixels. Basically, it provides a crisper and more clear image than non-HD recordings. This camera has a 55x optical zoom, meaning that it can zoom in on an object 55 times more than regularly recording with it, and also 8.9 megapixels. A pixel is a small, square shaped objects found on displays that, with many, produce images on screens. Pixels make up your television screen, computer screen, and so on. The greater amount of pixels, my camera having a high amount, the more clear the image is once again. This camera can also be screwed onto a tripod, which brings me to my next material I am using for this project.
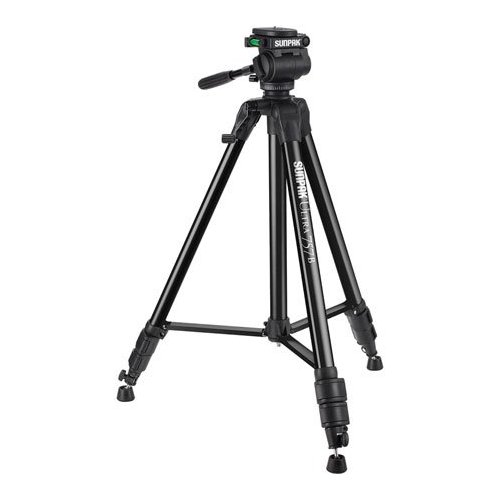
Tripod:
I will be using a 50" tripod, with a mini-tripod, to record steady shots for the videos I will be taking. Tripods allow the user to move their camera in a smooth pattern, so the shots aren't steady and unprofessional. Camera motions can make or break a video and a tripod will make my shots much nicer.
Software (Adobe After Effects and Final Cut Pro X):
After I record the videos I am making, whether for a test video or my final product, I will do the editing in Adobe After Effects. The possibilities in After Effects are endless! With a creative mind and general knowledge of the program, I can create an explosion, make a man get struck by lighting, or anything else I can think of. This program will be challenging to use but with the help of reliable resources I will be able to figure it out. After I have recorded and edited my video clips, I will compose them in Final Cut before exporting my completed video. Both programs are a major step up from the default iMovie my mac provides me with.
Clamp Lights/External Microphone?
I am still yet to decide if both the clamp lights and external microphone are necessary for my project. The clamp lights are a substitute for expensive photography lights that are not in budget for this project. If I were to buy the clamp lights they would help me to light up my inside recordings and could only enhance my videos. The external microphone I am considering getting would also be a cheap purchase to increase the sound quality and range for my videos. The boom pole that I would get with it would allow for better sound pickup then the built-in microphone on my camera. Both purchases would be cheap, but I do not feel they would be completely necessary for the goal of this project. If I do find that I have time to use them and that they would be effective in my videos, I will sway further into buying them.
 |
| http://www.costcentral.com/product-images-new/sony-hdr-cx260v-b.jpg |
Tripod:
 |
| http://photocrati.com/wp-content/uploads/2009/04/sunpak-ultra-757-tripod.jpg |
| Add caption |
| http://upload.wikimedia.org/wikipedia/commons/d/d3/Adobe_After_Effects_CS6_Icon.png |
| https://blogger.googleusercontent.com/img/b/R29vZ2xl/AVvXsEjPAjBFyx0BEo668n9iT9i7Yj2Kxv2g-g7p31jY31v787eFt-244fcPuuoHyR1H7gJUG3PKtWvtqcXAFAa6AKHIuURYSTBKrDkaep07w79FTU4JB7xLdFcsctXVaJT1vyaV64guGhRpTag/s1600/final-cut-pro-x-logo.jpg |
Clamp Lights/External Microphone?
 |
| http://videocontestnews.com/wp-content/uploads/2011/09/Reflector-Clamp-Light1.jpg |
 |
| http://cachepe.zzounds.com/media/quality,85/86469-a9dae2917d35d8b246d6ade5801c6f17.jpg |
There you go, a complete list of the materials I will be using for my cinematography project and why. I hope you found this interesting and make sure to check back soon for my progress updates! Bye for now...
Wednesday, February 20, 2013
Cinematography Introduction (First Post)
 |
| http://media.salemwebnetwork.com/worshiphousemedia/resource/images/main/s/cd/gra/cd/oldfilmreelcountdown.jpg |
Hello, my name is Ethan. Approximately two years ago I received a small, non-HD Insignia camcorder for my birthday. This irrelevant, insignificant object slightly peaked my interest into the cinematic world. As I began to fool around with the camera and watch short films on Youtube, I would quickly grow to enjoy this hobby.
Hello, my name is Ethan. Approximately two years ago I received a small, non-HD Insignia camcorder for my birthday. This irrelevant, insignificant object slightly peaked my interest into the cinematic world. As I began to fool around with the camera and watch short films on Youtube, I would quickly grow to enjoy this hobby.
Almost one year
after that day I received the second installment to my new videotaping
collection; a big green screen. I had no idea what I was to do with this piece
of equipment and, just as the use of camcorder, my interest of this hobby
started to slowly die off. My ignorance in this category caused my disinterest.
Time passed and
dust collected on my green screen until one day, I came across a video
displaying a true understanding of camera techniques, special effects, and
editing. It looked so professional that my interest was rejuvenated before I
could grab my green screen and now broken camera.
Today I begin
documenting my 6-7 week road to improving in cinematography for my 6-7 week
long Genius Project! My intentions
at the end of the project are simple: create a short film utilizing filming
techniques I will read and learn about. It will be jammed pack with
higher-quality shots and edits than I have ever done. To make sure I meet where
I would like to be at the end of the project, I will soon set myself time
frames to work on certain aspects of cinematography. If I stick to a schedule,
it will make the project much more enjoyable so I can do the work over a long
period of time and create a fantastic end result. At the end of my project I
will show my final product (short film) and compare it to a similar shot
without technique, to measure my growth in cinematography.
The steps I will take to improve:
1. Understand How to Use Equipment
2. Learn Appropriate Camera Angle Use/Camera Movement
3. Understanding of Editing and Effects
4. Shot Composition
5. Finalize Videos with Transitions and Tweaks
The steps I will take to improve:
1. Understand How to Use Equipment
2. Learn Appropriate Camera Angle Use/Camera Movement
3. Understanding of Editing and Effects
4. Shot Composition
5. Finalize Videos with Transitions and Tweaks
To help me reach my goal of improving evidently on each of the steps listed above, I will use many sources I read about online or in a book. One major source
I read today that I will be using is, http://courses.iddl.vt.edu/DEDCM001/sa/index.html (pictures below taken from here), is in association with Virginia Tech
University and explains the purpose of specific camera angles, camera
movements, and framing. For example, image A you see below is taken at a “high
angle”. This is used to show lack of power, which is unlike image B showing a “low
angle” shot used to display power or someone as sinister. This will be a great
website to refer to when recording. I also browsed tutorials on http://www.videocopilot.net/tutorials.
They have a huge library of Adobe After Effects, one of the main editing software’s
I will be using, which will be very helpful to refer to after recording.
 |
| A |
 |
| B |
It seems that this project will be
challenging because I obviously will not be able to master cinematography in a
matter of weeks. Besides the fact, I am greatly looking forward to starting and
I think this will be very fun all together.
Well, that's all the information I gathered this week. I have gathered most of supplies I need and I am ready to start practicing with my new information. Oh before I go, I would like to share my first project checkpoint. On this upcoming weekend I plan to broaden my knowledge of my equipment and when to use it, but during the following week and weekend I would like to start storyboarding and film my original movie, before I incorporate any of the new things I will learn. Once I have this complete I can work on improving it and make a similar movie for my final product displaying how I can greatly change it and make it better. Until next week...
Well, that's all the information I gathered this week. I have gathered most of supplies I need and I am ready to start practicing with my new information. Oh before I go, I would like to share my first project checkpoint. On this upcoming weekend I plan to broaden my knowledge of my equipment and when to use it, but during the following week and weekend I would like to start storyboarding and film my original movie, before I incorporate any of the new things I will learn. Once I have this complete I can work on improving it and make a similar movie for my final product displaying how I can greatly change it and make it better. Until next week...
Subscribe to:
Comments (Atom)